With the release of the new size range for the Marlborough bra sewing pattern, I thought it would be a good time to review some bra sewing pattern adjustments. Since I have had requests for larger band sizes, I am going to start with a tutorial on how increase a bra band.
For some background, I draft my bands based on the ideal bra fit that I describe in this post. To provide the best support, my general rule is that you should not be able to get more than two fingers under the band.
Sister Sizing
The good news is that adjusting a bra band is really simple. Let’s start by taking a look at the size range of the DDD to J cup pattern shown below. The recommended wire size is in the far left hand column followed by sister sizes as you read across the table. The sizes in black text are included in the pattern and the grayed out sizes are some of the sister sizes.
“Sister size” is a bra term that means that the cup volume is the same, only the band is different. For example, the 34J, 36I, 38H, 40G and 42DDD all use the size 50 wire, they are sister sizes and all have the same cup volume. The difference between those sizes is in the band.
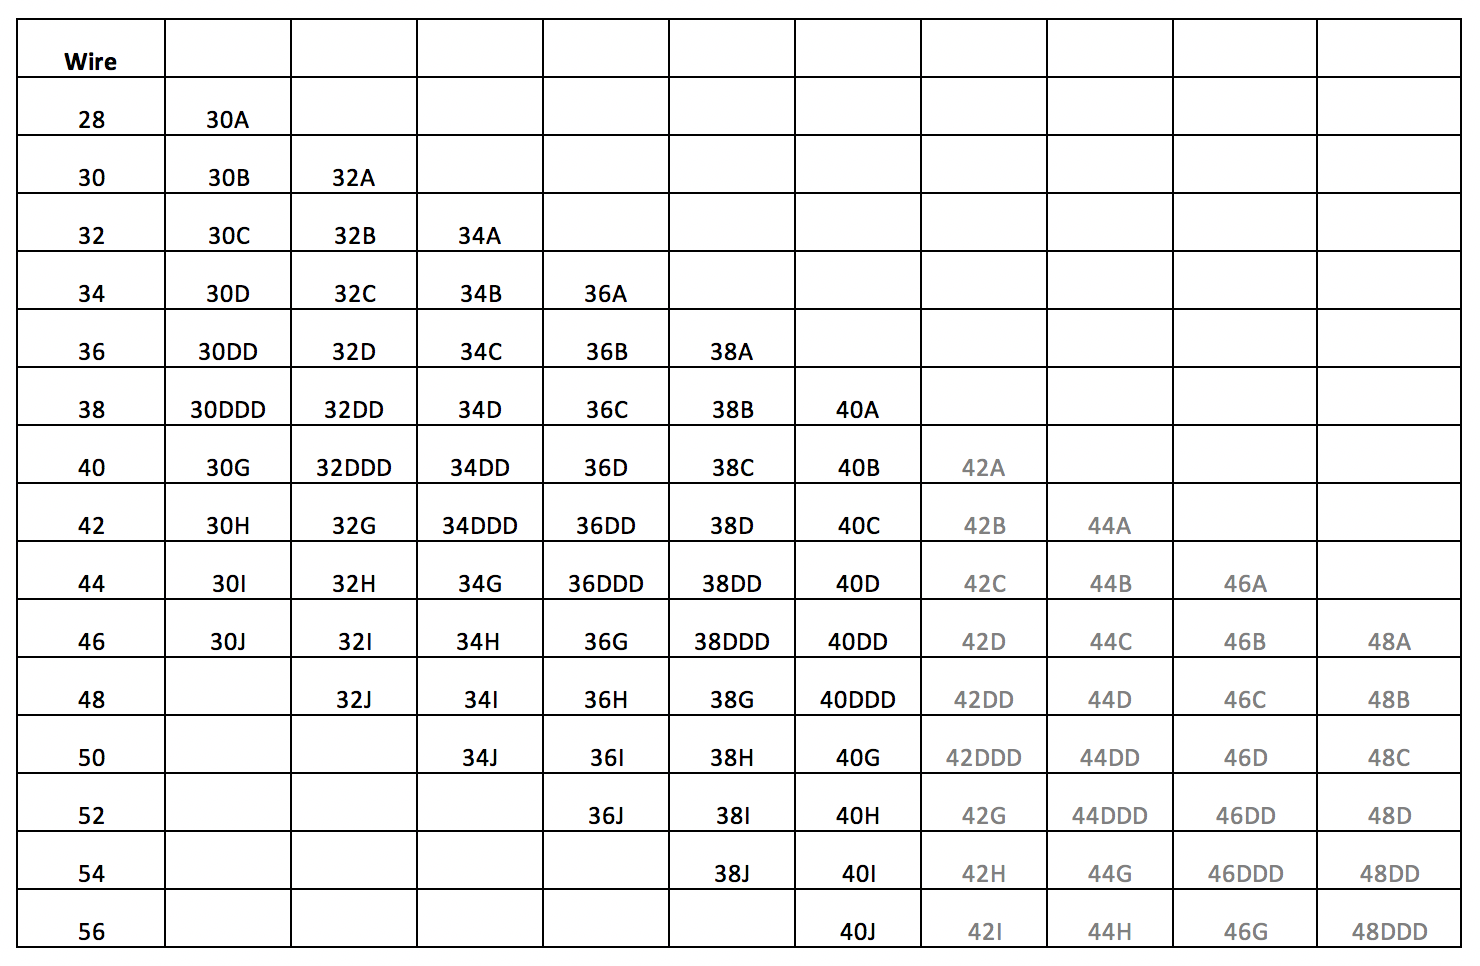
So let’s talk about how to get those grayed out sizes!
Amount to Add to the Bra Band
To make it super easy for you, the table below tells you what you need to add to the band of the Marlborough DDD to J cup size pattern depending on how many band sizes you want to add.
Now for the step-by-step pattern changes!
How to Add to the Bra Band
I wanted to make it super easy to add to the bra band for this size range so all you need to do is increase the span of the band. My favorite way to make this adjustment is to find the flattest area of the band, use a slash and spread technique to make the increase then smooth the lines to get your new enlarged band pattern piece. The slash and spread technique means you don’t have to mess with truing up the side seam.
Here are the step-by-step instructions:
- Find the flattest point of the band pattern piece and at that point draw a line parallel to the side seam.
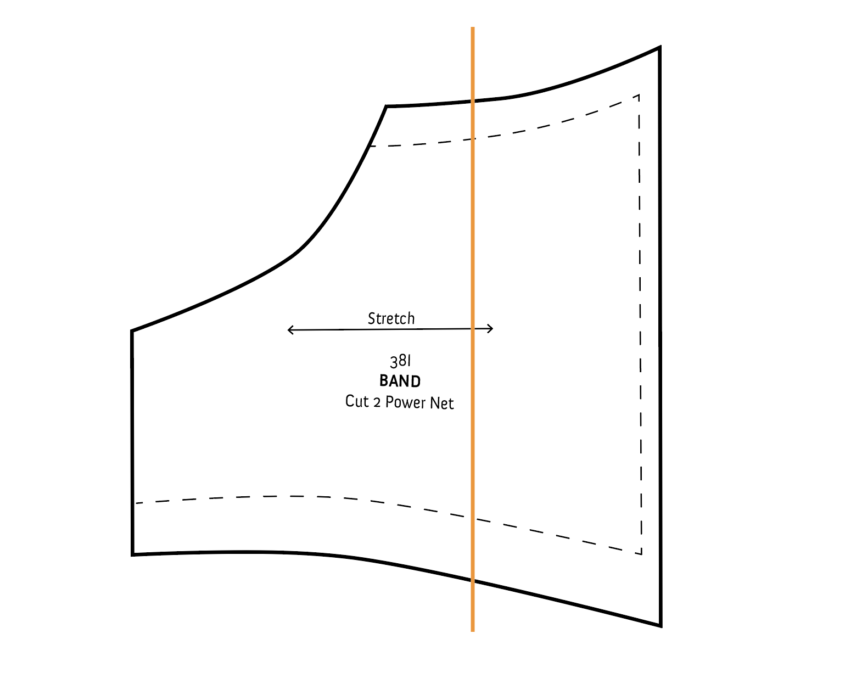
2. Cut along the line you drew in Step 2 and spread the band apart by the amount needed.

3. Smooth out the lines of the band (I left I the original lines so you can how this looks).

As with all pattern adjustments, I highly recommend making a toile (a.k.a. a muslin) before making your final garment. Remember, it is easier to take away from a band that is too large versus trying to add to a band that is too small!
I have more pattern adjustment posts on the way! If there is anything in particular that you are interested in learning about, let me know in the comments!
