
I am loving seeing all of your Lexington Bras! I hope today’s pattern modification will inspire you to create even more lovely Lexingtons!
This variation came about while I was researching inspiration for the Lexington bra. I noticed several similar styles with a split lower cup. I love the look of the split cup and as a bonus, splitting the lower cup is also a great way to add volume to the cups. If you made up a muslin of the Lexington bra and it looks like you need some additional volume in the lower cup, give this alteration a try!
In order to know how much to add to the lower cup pattern, take a close look at the fit. Once you have decided on the amount to add, divide it in two to get the amount to add to each side of the cup. In this tutorial, I’m adding ¼” to each cup piece for a total of an additional ½” in volume, my usual recommended starting point when the cup needs additional volume. Note that if you need to add more than ¾”, you should probably go up a cup size instead.
PATTERN MODIFICATION
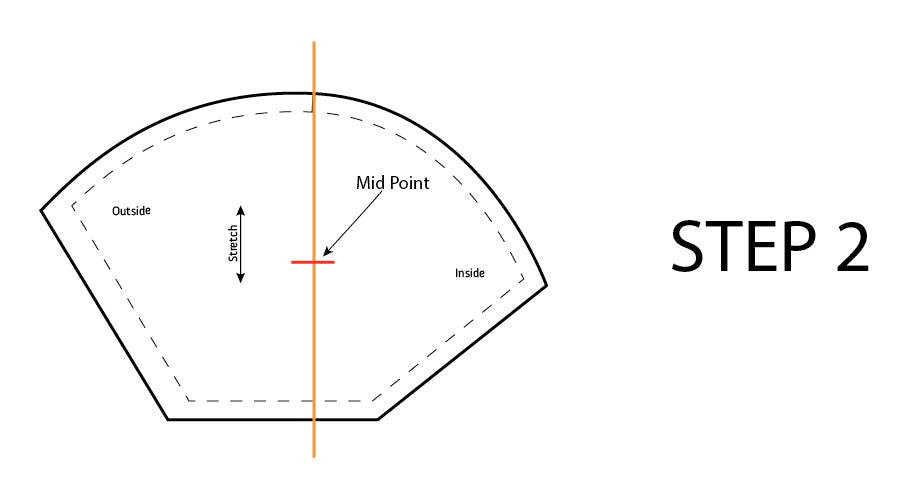
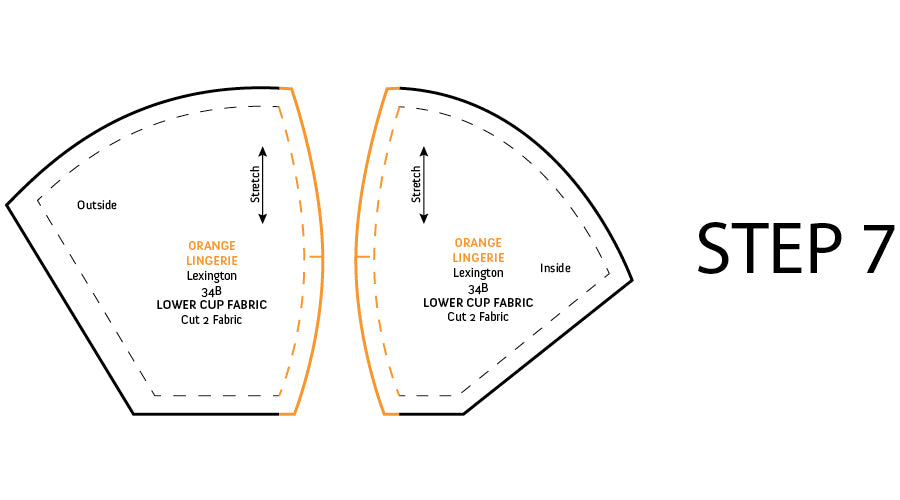
1. To start, draw a line from the notch to the base of the lower cup. This line is drawn parallel to the stretch arrow.

2. Measure from seam line to seam line to find the midpoint of the line you drew in step 1. Mark this point.
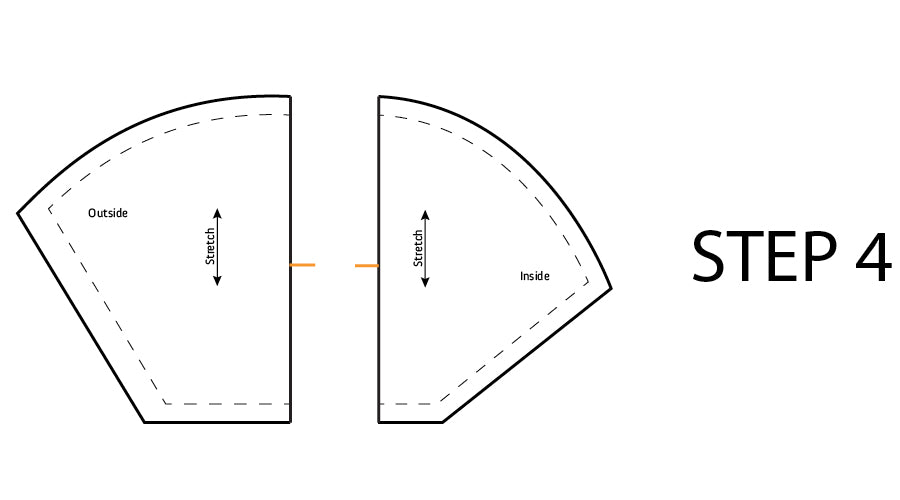
3. Cut along the line you drew in step 1 (the orange line) and tape the pieces to pattern paper so you can expand along the cut line.
4. From the center point marking you made in step 2 (the red line), measure out the amount of the increase you calculated while fitting. In this example I am using ¼”.
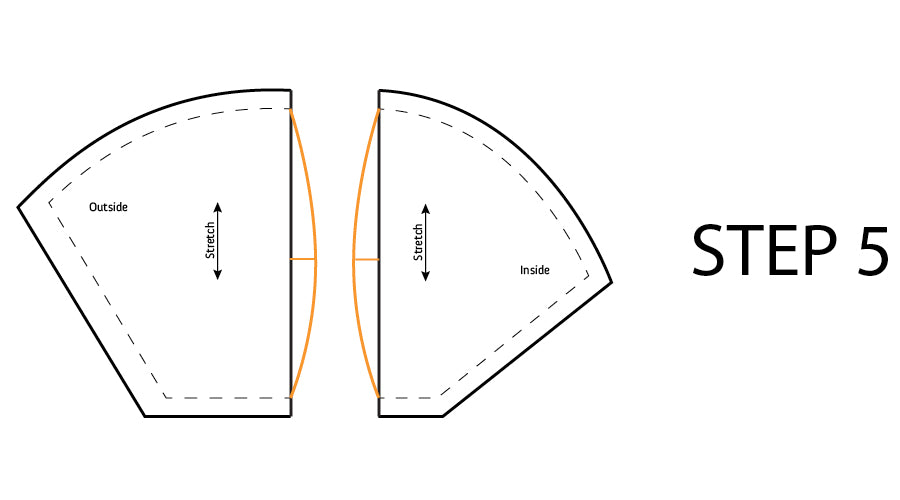
5. Draw in a new seam line. Remember, all pattern changes are made from the seam line, not the cutting line!
6. Add ¼” seam allowance and draw in a new cutting line. Then trace over the seam and cutting lines from one side to the other – so you know they match – and extend the mid-point line from step 3 to be the construction joining notch.
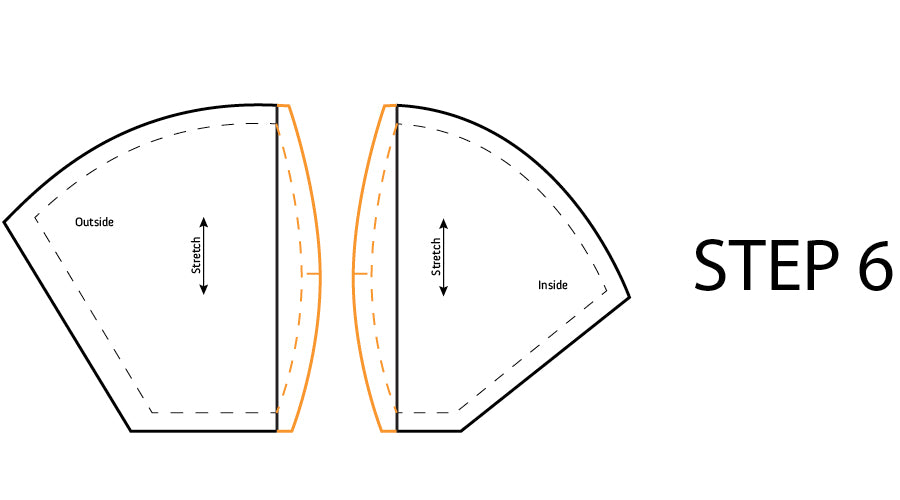
7. Mark the revised lower cup pieces so you understand their directionality and placement in the final bra.
 Don’t forget to make the same alterations to all three lower cup pieces – the fabric, foam and lining. All three need the same alterations to make it work!
The construction of the bra remains the same, once you’ve sewn and topstitched the lower cup pieces together.
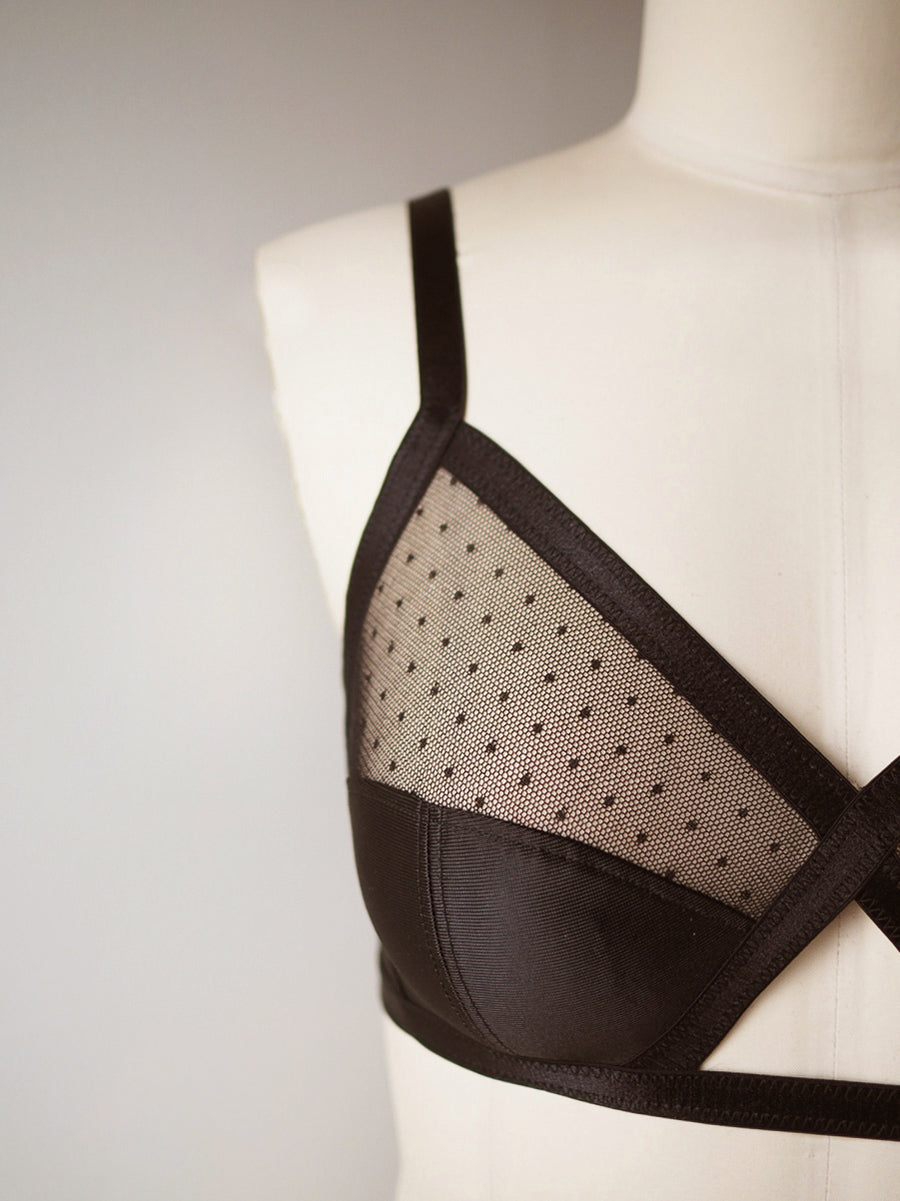
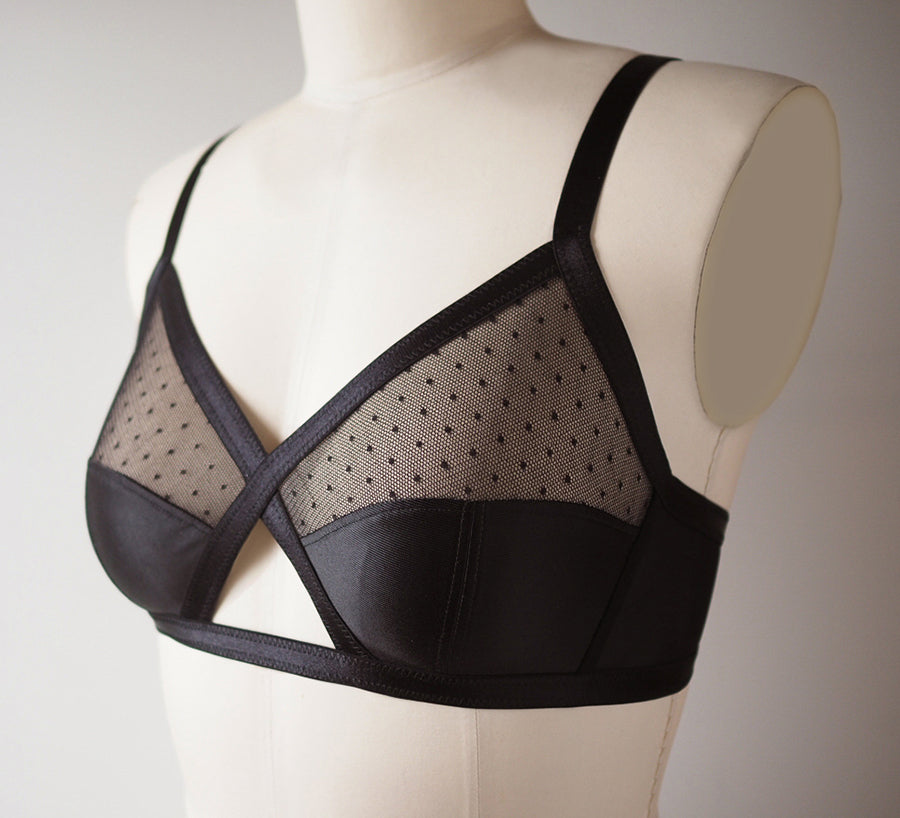
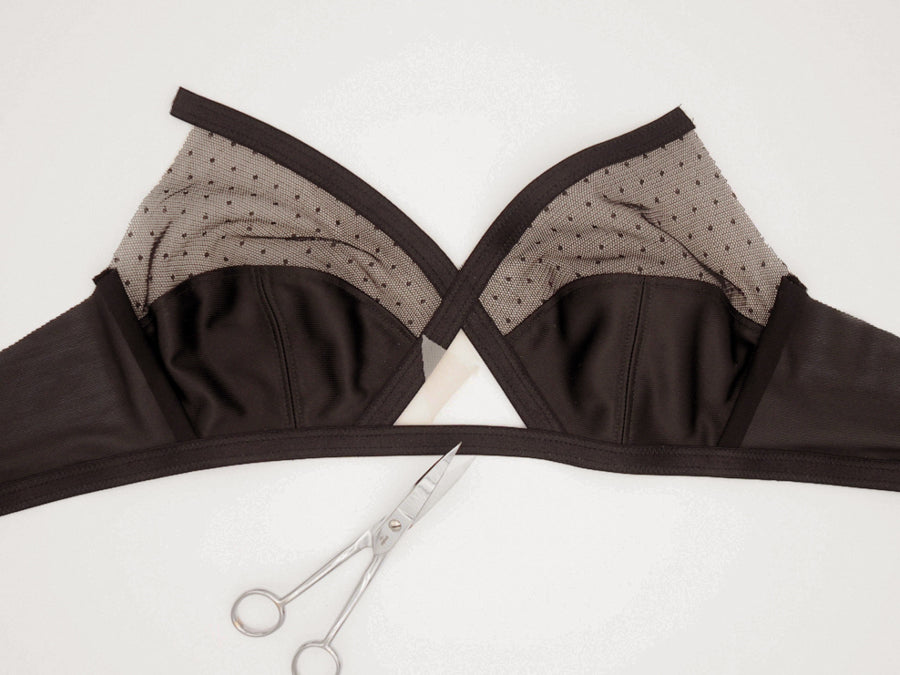
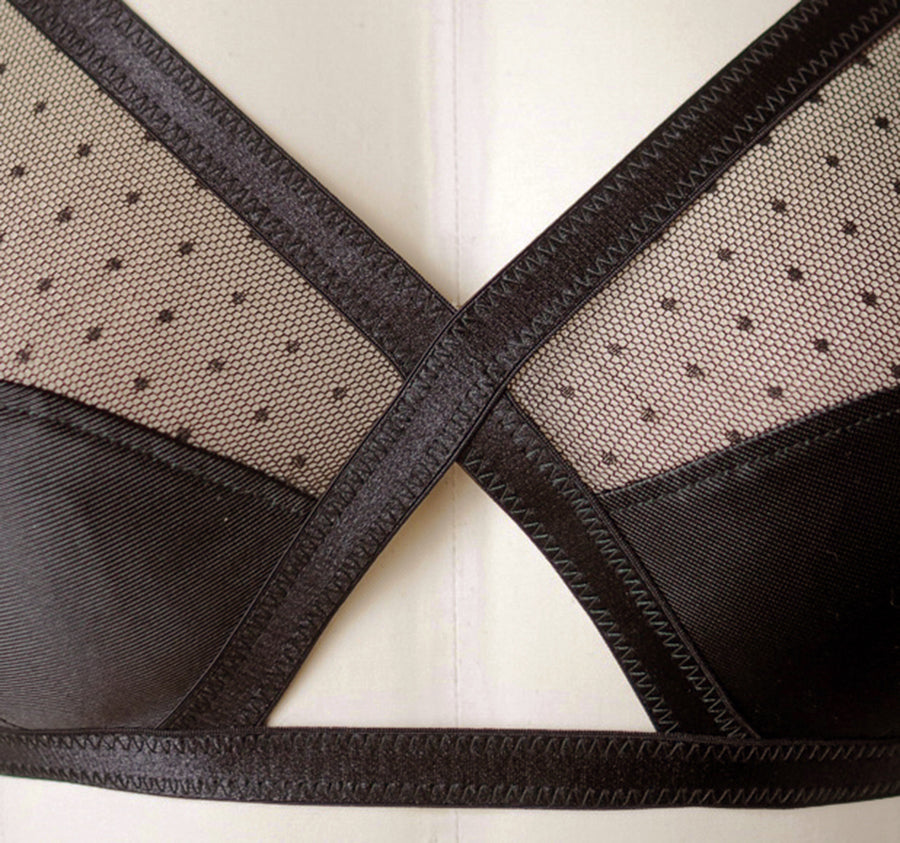
You may also notice that for this variation I experimented with cutting away the bridge after the elastics were sewn on to create this peek-a-boo look. To do this I used the same non-stretch lightweight lining that I used for the upper cup for the bridge and very carefully cut it off along the stitching line with my appliqué scissors.
This bridge variation is a fun addition to the split lower cup style because the added volume in the lower cup helps ensure that the elastics at the bridge hold firmly to the body.
I hope you enjoy this Lexington bra pattern variation as much as I do!