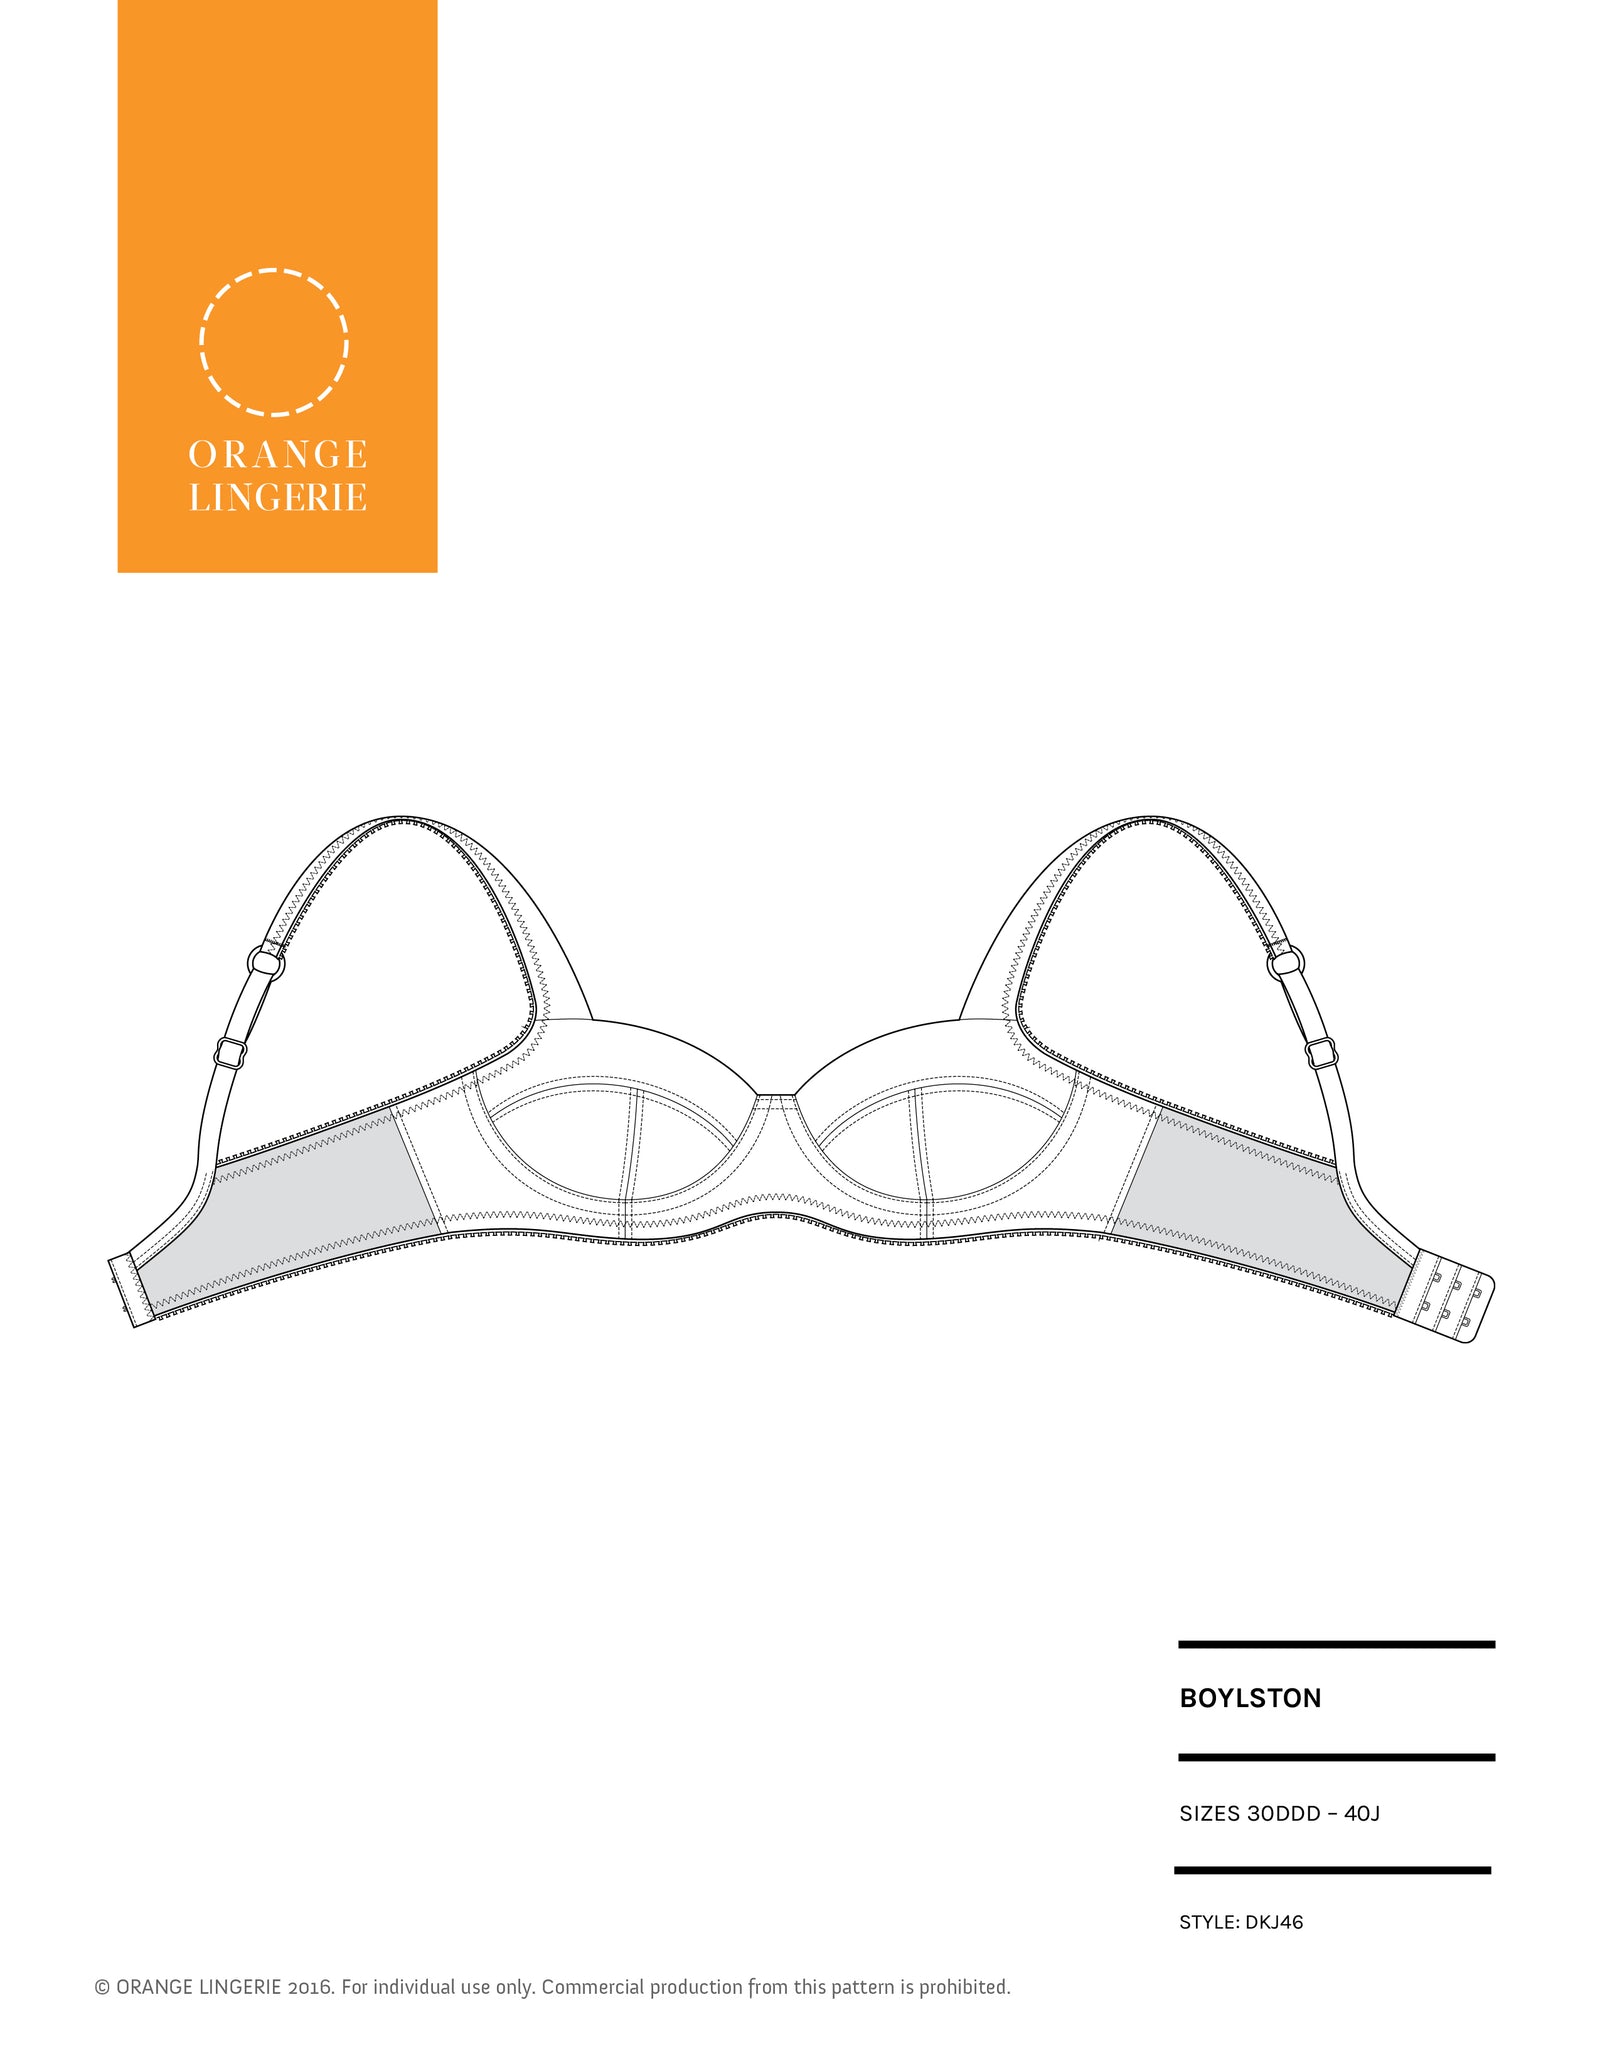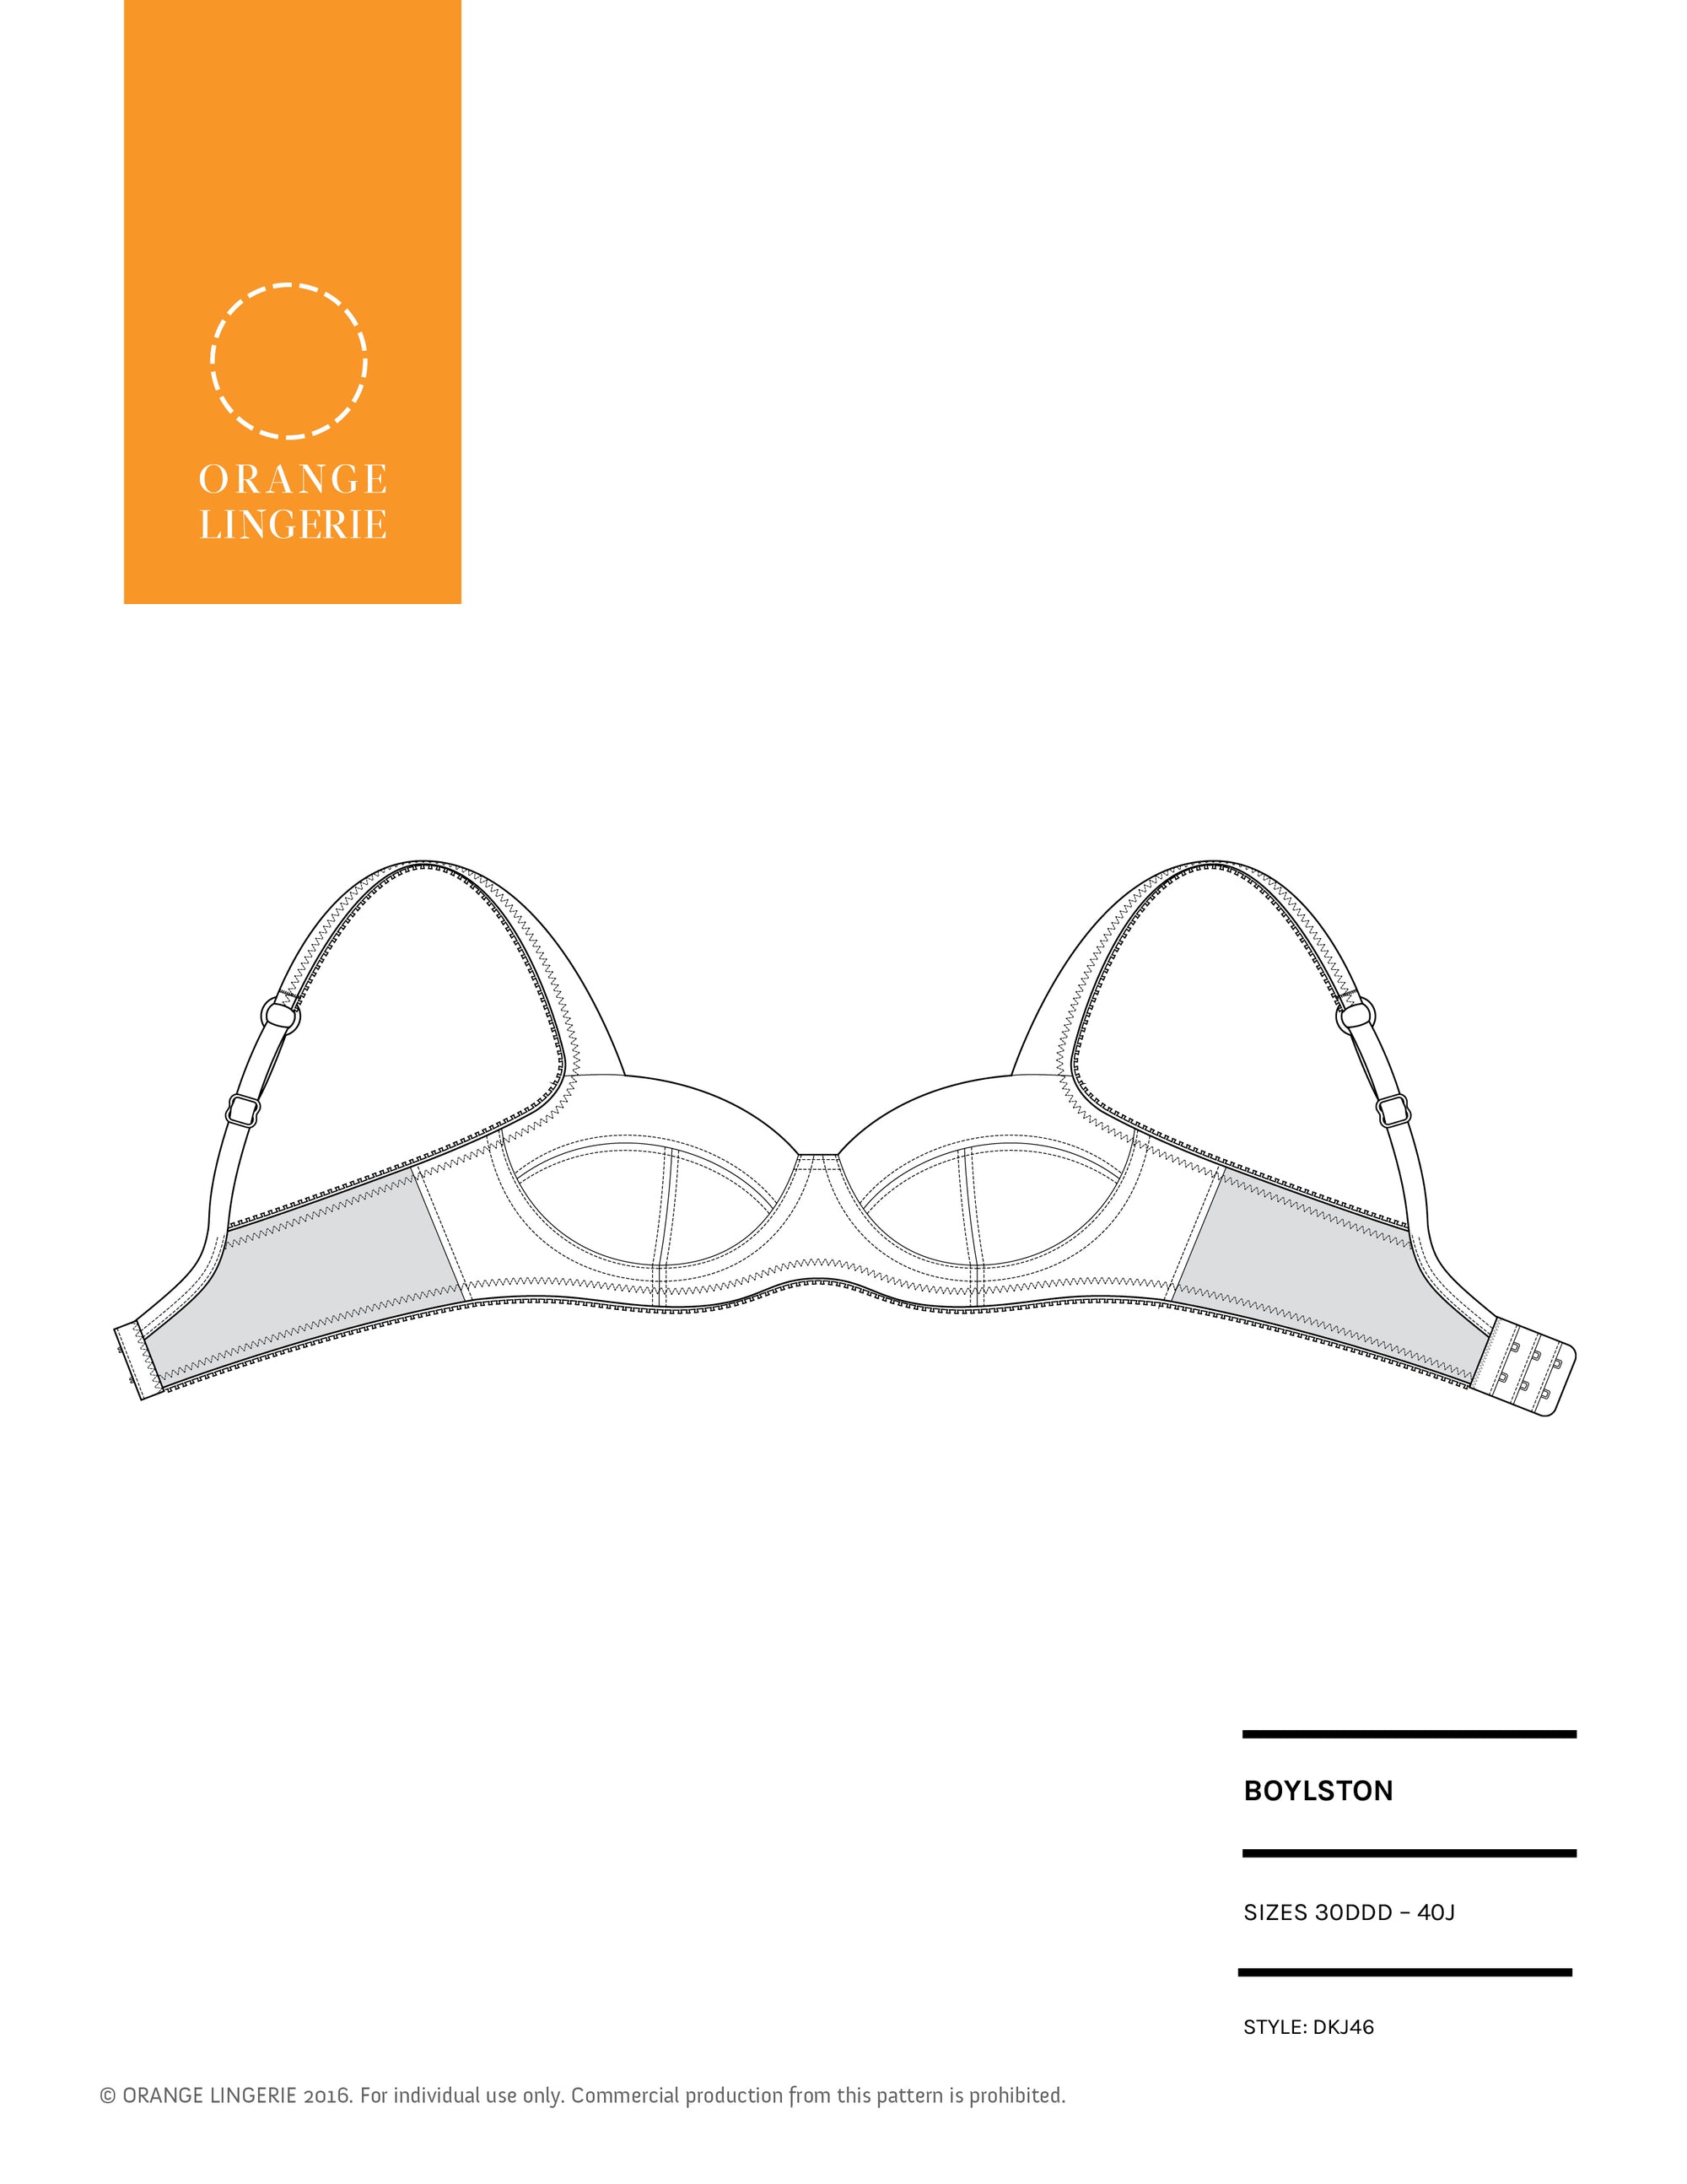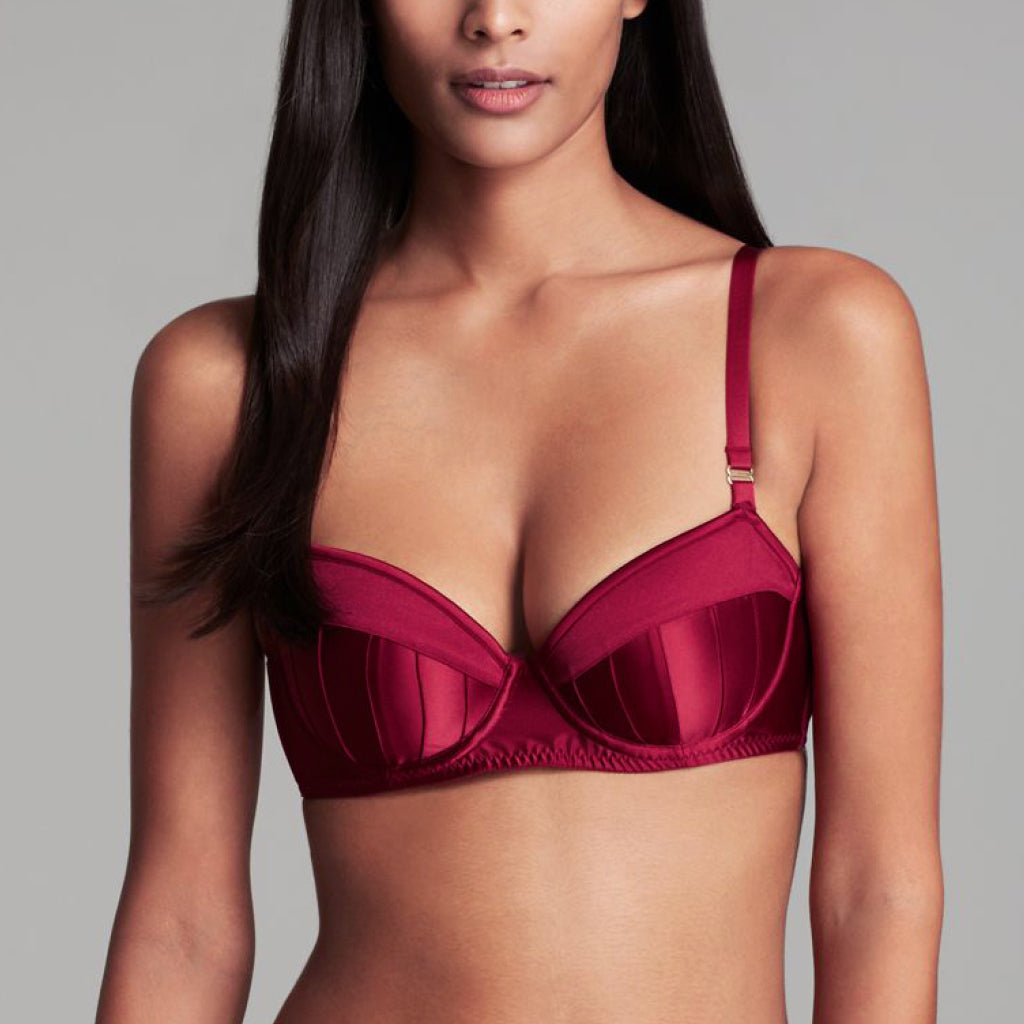

I have always liked this pin tuck technique on the Stella McCartney “Cherie Sneezing” bra. I just love how it adds depth and interest to the overall design. I have been wanting to try this out and thought that the Boylston bra, with its clean lines and balconette neckline, would show off the pin tuck effect best. Today I’ll walk through how to modify the lower cup patterns and how to sew it up to get this look.
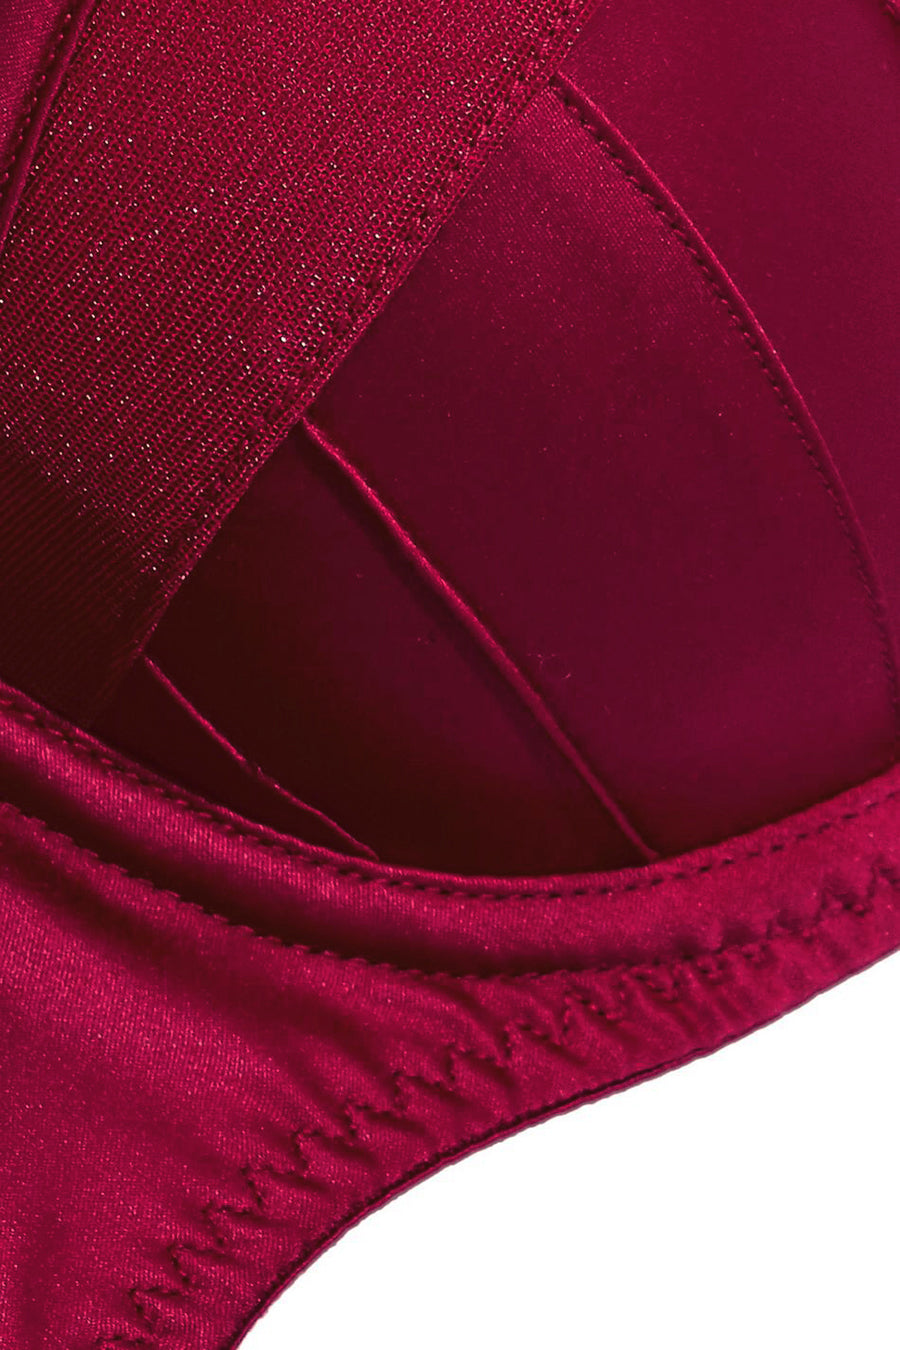
photo credit The Outnet
For this alteration, you will only need the inner and outer lower cup pattern pieces, along with extra paper, tape, paper scissors, a straight and a curved ruler and a pencil. The rest of the pattern pieces will remain unchanged.

photo credit The Outnet
The first step is to define the number of tucks and the spacing of the tucks. I’m taking my inspiration from the Stella McCartney bra (pictured above) which has 5 tucks across the entire lower cup. I love how the tucks radiate out from the bottom to make it look like a seashell so this tutorial will show you how to get that look.

photo credit Bloomingdale's
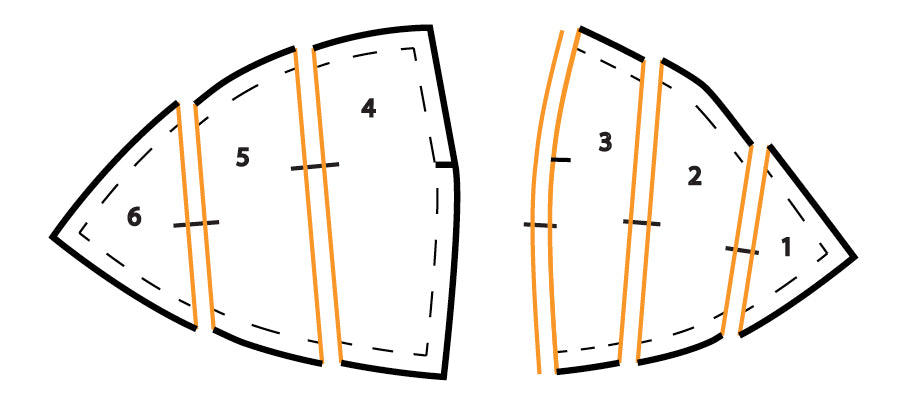
To start the pattern alterations, measure out and draw lines on the pattern pieces to indicate the tuck placement. The center seam will have a tuck built into it, so I used that as my point of reference for calculating out the spacing for the rest of the tucks.
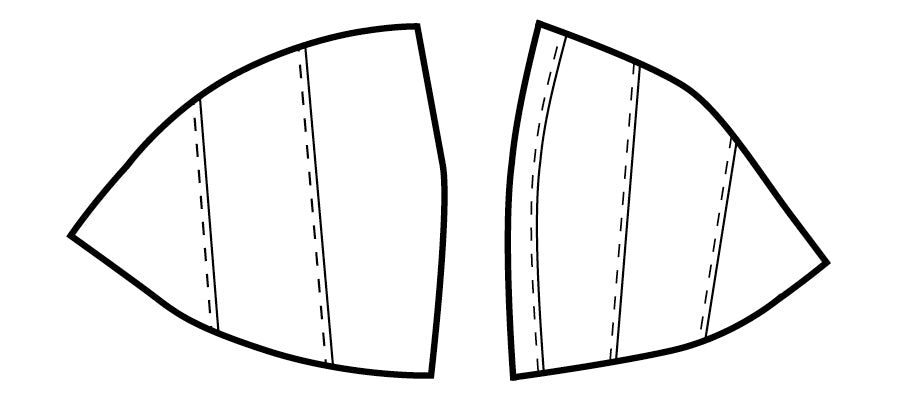
Overall, I am aiming for a symmetrical distribution of tucks. In order to achieve this, taking one piece at a time, I measured the top seam line, divided it in three and marked the seam line. I repeated the calculation and markings for the bottom seam line. I then connected the markings with straight lines. This creates a fairly well distributed and angled tuck placement. You can play with the distribution of tucks to get the look that is most appealing to you.
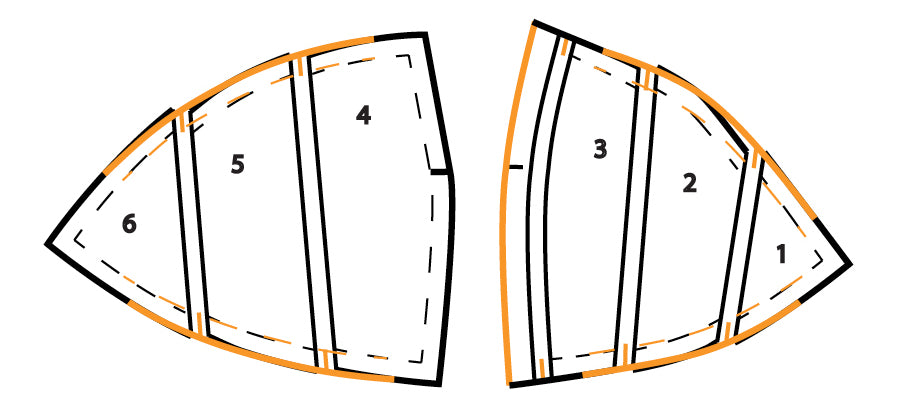
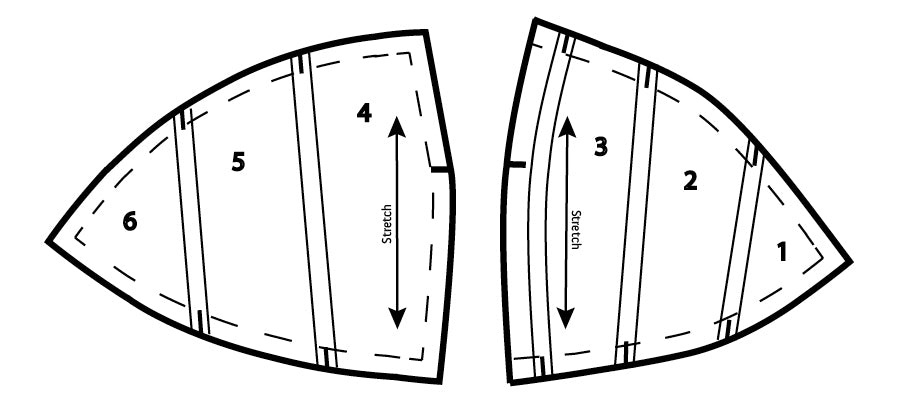
Once you have your placement lines finalized, go through and number each section and add a perpendicular line across each section line. Also, be sure the stretch line appears unbroken in one of the sections (we omitted it from the drawing below to avoid making it too busy!). Transfer the stretch line if necessary, maintaining its direction and angle.

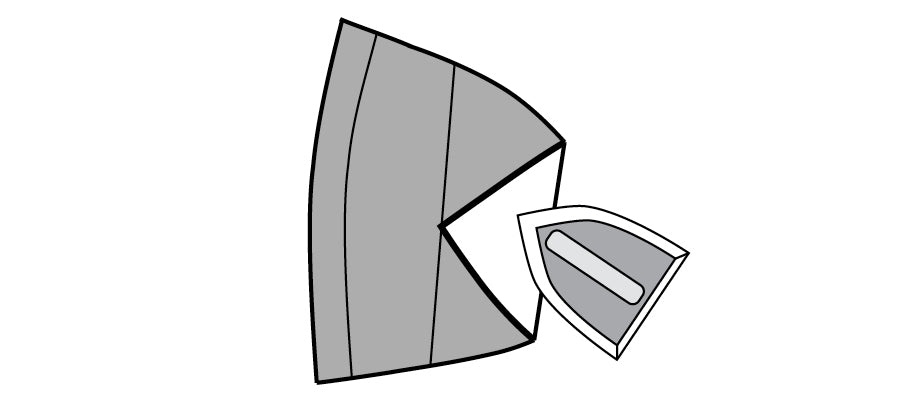
Now you are going to use the slash and spread method to create the tucks. Start by carefully cutting apart the sections along the tuck lines you marked on your pattern. For the center line, cut the seam allowance off the inner cup piece only.
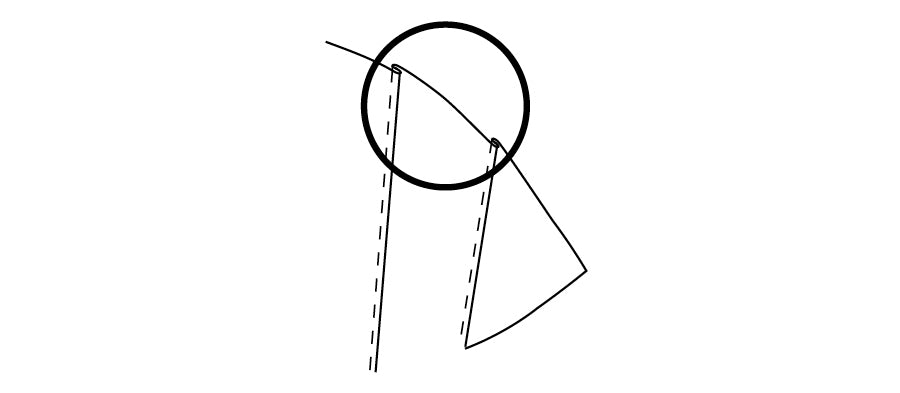
Tape the section 1 to a paper and, using a ruler, draw a line ⅛” away from the cut edge. Tape section 2 to the paper with the cut edge lining up with the new line you just drew and the perpendicular lines are matched up. This will ensure that the seam lines will line back up when you sew the tuck closed.
Continue in this way for all sections. When you get to the center seam line, use a curved ruler to follow the curve of the original seam line ⅛” away. The original seam line will be one side of your tuck and the new line will be the other side of the tuck as well as the new seam line. Be sure to check that the new seam line is the same length as the original so that it will still fit together with the outer cup piece.
Once complete, blend the seam and cutting lines across the tucks and add a notch in the center of each tuck at the top and bottom. Finally, add back the seam allowance to the inner cup piece at the center line.
Cut out your new pattern pieces and cut the bra out of your fabric as normal. Mark the center fold line of each tuck with a chalk or water soluble fabric marker.
To sew the pintucks, fold and press firmly along each tuck line with the wrong sides together. At the curved seamed line, you’ll want to press carefully with the tip of your iron to maintain the curve.
Carefully, sew each tuck at 1/16” from the pressed edge. If you have an edge stitch foot for your machine, you may want to use that to help you stitch close to the folded edge. I aligned the pressed edge with the inside of the presser foot “toe” and moved the needle until it was 1/16” from the edge. Whichever method you use, accurate sewing at this stage is critical to maintain the correct shape and size of the cup! Press the finished tucks from the wrong side of the cup towards the center front.
With the right sides together sew the outer and inner cups together in the ditch of the tuck and press the seam toward the inner cup. The tuck should remain to one side of the needle as you sew the seam so that it doesn’t get caught. If your material frays, pink the seam allowance to keep it from fraying instead of top stitching it. You can also line the cup as per the instructions to conceal the raw edge. Be sure to keep a set of unaltered lower cup patterns for making the lining.

Now you can proceed with the rest of the bra construction as normal!
Enjoy your new pin tucked bra and don’t forget to tag #boylstonbra and #orangelingerie so I can find all of your beautiful bras!